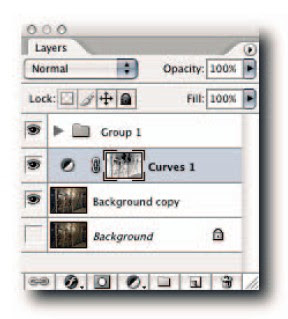
From left to right,the icons allow the following controls:
Lock Transparent Pixels—Clicking the icon locks the transparent areas on the layer—useful for filling and painting without affecting the transparent pixels on the layer.
Lock Image Pixels—Clicking the icon prevents filling and painting.You can still move, crop,and slice the content, but changing the color values is not allowed.
Lock Position—This is essentially the opposite of Lock Image Pixels. While the icon is in the down position, you may change the values of the pixels but not move them on the grid.
Lock All—Just as its name implies, clicking this icon locks the transparent areas and prevents editing and moving of all pixels on the layer. Basically,about the only thing it will permit is slicing and cropping. Take note,the icons act as toggles; click a second time to unlock. When Lock Image Pixels is selected, Lock Transparent Pixels is not available. This may seem paradoxical until you realize that the transparent areas also contain pixels (see the Tip that follows). If all the icons are grayed out, the options are not available for the current layer.
TIP: To paint transparent pixels without affecting the opaque pixels, choose the Behind blend mode in the options bar for the Brush tool.
by Shangara Singh
http://www.kreativsolutions.blogspot.com
http://www.kreativsolutions-indesign.blogspot.com
http://www.kreativsolutions-illustrator.blogspot.com
http://www.kreativsolutions-photoshop.blogspot.com
http://www.kreativsolutions-acrobat.blogspot.com
Facebook link:
http://www.tinyurl.com/elsontan


No comments:
Post a Comment